MR. TRIANGLE'S ADVENTURE


Beat Your Vegetables before they Beat You!
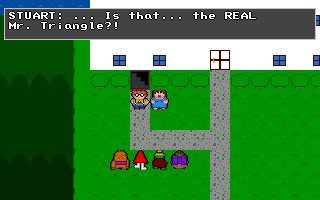
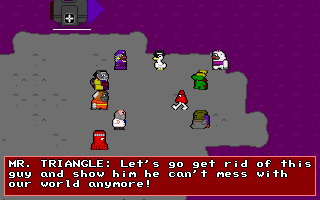
An evil alien has invaded the planet and has been conducting sinister experiments on the world's inhabitants. When word reaches Mr. Triangle, he will once again rise to the challenge of protecting his home. On his journey he'll fight evil mutated vegetables with his friends, Jojo the ape, Gary the magician gator, and Marvin the rocket manatee! Throughout your quest to rid the world of the self proclaimed Mastermind of Evil, Mr. Triangle and his friends will learn about the ancient history of the planet in hopes of gathering the strength to send the alien menace back where he came from! Mr. Triangle's Adventure is a classic RPG with a massive world to explore. Each character has vital abilities, emphasizing the power of teamwork. Boss battles have intricate patterns that you will need to figure out if you hope to get closer and closer to Mastermind as well.
In Mr. Triangle's Adventure you will embark on an entirely original world, visiting unique locations and interacting with all types of people. More often than not, the game will break into battle, where you'll fight these vegetable menances in an Active Time Battle System. Each character in your roster have distinct characteristics that make them vital for battle. For instance, Jojo the ape is designed to be only a healer, tossing out restorative bananas to keep your party healthy. Boss battles will test your knowledge of the core four characters along with your ability to think on the fly to come up with solutions to lead to your victory.
Soundtrack was made by Soda Piggy. All clay figures for promotion were made by Atavus Oddities.
To get access to deluxe content on mobile devices be sure to donate a minimum of $1.00 to Red Triangle Games. The same content will be made available to Steam players. A code will be emailed to you once it is available.
Check out the soundtrack to Mr. Triangle's Adventure!


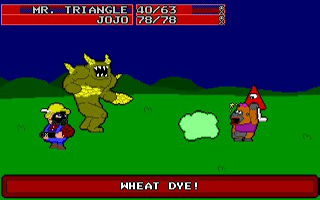
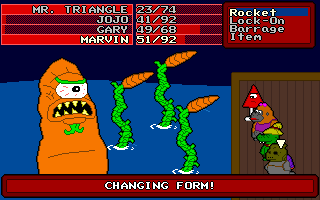
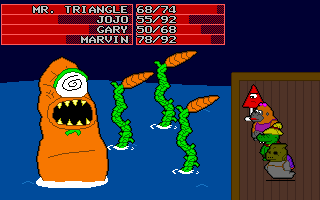
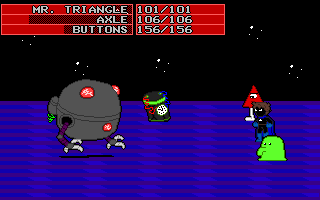
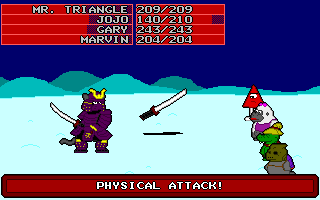
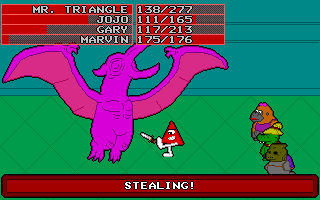
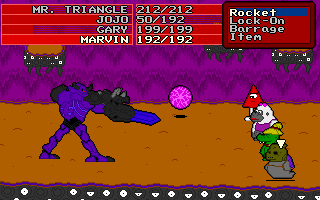
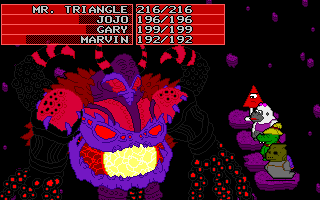
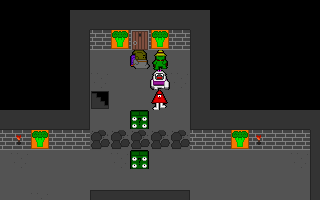
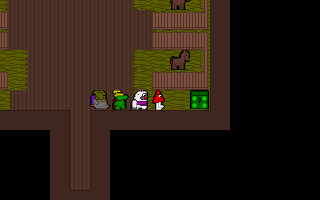
LOCATION: Wheat Farm
Farmer HP: 100 / Manic Wheat HP: 100
EXPERIENCE: 100; GOLD: 100
PRIZE: Manic Wheat Charm
STEAL: Farmer: Wheat Dye / Manic Wheat: Rehab
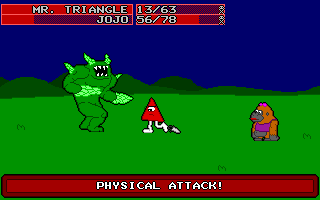
At the start of this battle, the Manic Wheat will be yellow. Steal the Wheat Dye from the Farmer using Mr. Triangle, and then with any other character, use the stolen item. This will cause the Farmer to run away and the Manic Wheat to change form. From here, use offensive attacks with Mr. Triangle and alternate between Yellow and Green Bananas with Jojo until the boss is defeated.
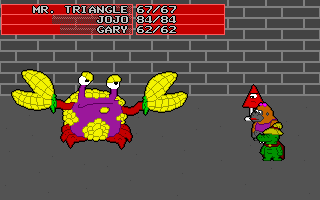
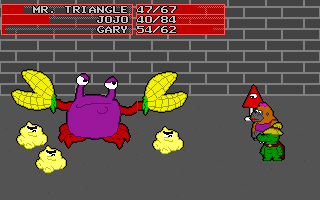
LOCATION: Corn Castle
HP: 225
EXPERIENCE: 300; GOLD: 150
PRIZE: Party Drinks
STEAL: Gold Rock (without corn armor)
Using Gary's Fire spell, you can burn away the Corn Crab's corn armor, which will decrease his defense drastically. Maintain hero health using Jojo and Mr. Triangle when needed. Every time the Corn Crab changes form, he will summon Popcorn. It's important to keep the battlefield clear of Popcorn, because every time you use Fire on the armored version of the boss, more will appear and can potentially overwhelm the heroes.
To get the most out of the next town, try to focus on having Gary use Fire on Corn Crab when he's in his armored form, then when he's unarmored, have Mr. Triangle steal from him. If you steal enough Gold Rocks you can comfortably stock up on new armor, weapons and charms at Greens City.
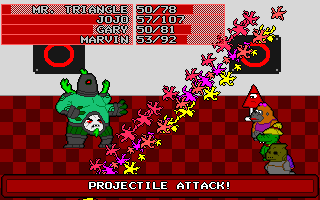
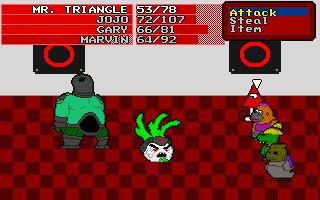
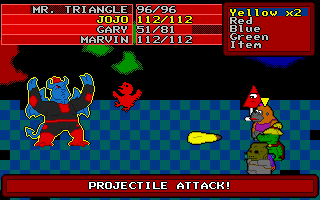
LOCATION: Beach
HP: 190
EXPERIENCE: 275; GOLD: 125
PRIZE: Party Drinks
STEAL: Shades (while wearing)
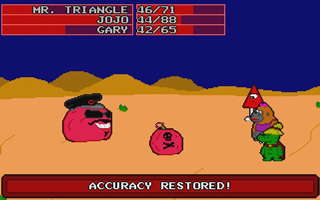
While Commander Red has his Shades equipped his accuracy and evasion are heightened. Once you remove them you can land your moves a bit easier. Commander Red shoots onion rings at single players, but the thing to watch out for with Commander Red is when he summons his Onion Bomb. This bomb is capable of wiping out the entire party. To prevent this, use Jojo's red bananas to power up Mr. Triangle so that when it appears you can remove it in one hit, versus giving it a chance to detonate.
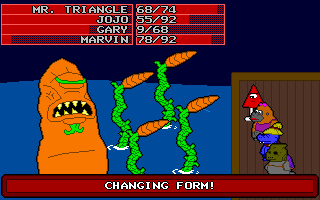
LOCATION: Pirate Ship
HP: 250
EXPERIENCE: 500; GOLD: 249
PRIZE: Carrot Charm
STEAL: Rehab (when stunned)
The Carraken has three forms. When it's eye is closed, you Gary's Wind spell to cause it to open up. When it's eye is closed, his defense is very low. When his eye is opened, use Marvin's Lock-On move to then paralyze the boss. Upon paralyzing the boss, small pieces of Carrot Cake will heal the party. This is the time to do big damage to the boss, before he can revert back to his eye being closed. Maintain a mixture of healing and stat boosting with Jojo to help keep everyone alive.
LOCATION: Team Onion's Hideout
Armor HP: 120 / Commander HP: 325
EXPERIENCE: 1000; GOLD: 250
PRIZE: Anti-Venom Accessory
STEAL: Smoothe
Commander Green has two parts. Only in one form does the damage actually matter. In the 1st form, it's Commander Green in his mechanical suit of armor. Once it takes a big enough beating he'll retreat out of it for a while. At this time you need to hit him, because once he's done there, he's done for real. Throughout the dungeon there are various coconut smoothies to encourage you to get used to raising Gary and Jojo's stats in battle. Since Commander Green has a couple moves that get rid of power and defense, your best bet is to waste as few turns on raising your offensive fighters as possible so they can knock out the armor and then knock out Commander Green. Use a few Coconut Smoothies to raise Jojo's magic and then once it's reasonably high enough, raise everyone's stats. While she's raising stats make sure to have someone else be a designated healer. Stocking up on Banana Pies from the Greens City Bakery will help keep you alive in this fight.
LOCATION: Tomato Tower
HP: 350
EXPERIENCE: 1200; GOLD: 250
PRIZE: Party Drinks
STEAL: Killer Tomato Charm
Killer Tomato has 3 forms. Physical, Magic and Weak. One thing you might figure out, is that any attack done to the Killer Tomato has a reaction. If you hit him with Mr. Triangle or Marvin, he transforms to his Physical form and gets a boost in power. If you hit him with Magic from Gary, he transforms to the Magic form and gets a boost in Magic. After he performs a giant move, he will reset everyone's power and magic stats. The easiest way to win is to try and get your ATB gauges as close to full for your fighters and have Triangle and Marvin attack and then follow up with Gary. Killer Tomato is going to attack you, and regardless of if you attack him or not, he will do his super move and he will reset all of your offensive stats so if you spent the fight building up your stats you could be sorely disappointed when he resets them. So it's best to just have your fighters dish out damage and keep his damage to a minimum. When things get tough, swap out Triangle or Marvin for healing items to help Jojo with keeping the party healthy.
LOCATION: Mastermind's Ship
HP: 500
EXPERIENCE: 6000; GOLD: 500
PRIZE: N/A
STEAL: N/A
Mastermind is a relatively straight-forward fight, with an emphasis on survival and teamwork between Axle and Buttons. Buttons should start the fight by casting Regenerate on both himself and Axle to keep that going as quickly as possible and then focus strictly on healing. Focus on having Axle use his regular attack and not his Blade Shot move since you can get approximately 1.5 more hits in without waiting for the Blade Shot to get ready. If Buttons falls, quickly revive him with either an item or Axle's Assistance move. Maintain a balance of offensive with Axle and party maintenance with Buttons and you should take Mastermind down.

LOCATION: Temple of Mystery
HP: 450
EXPERIENCE: 2400; GOLD: 500
PRIZE: Party Drinks
STEAL: Cherry Smoothe
When Spinosaurus opens it's mouth do not attack it. He will counter with a deadly move. Maintain party health and hit him when his mouth is shut. You will need to be careful to keep at least one party member at full health at all times because when Spinosaurus is weak, he will perform his Extinction move, which will wipe out himself and dish out near-fatal hits to all four heroes.
LOCATION: Magic Zone
HP: 300
EXPERIENCE: 4400; GOLD: 1000
PRIZE: Great Glasses
STEAL: Gargoyle Staff
Gordon has a magic aura on him that prevents you from doing any damage to him. However, upon hitting him, a chicken spirit will appear. The chickens appear with a unique color. Based on the colors established from Triangle Man and Killer Tomato and your smoothies, you should hopefully realize that Red is for Power and White is for Magic. If a chicken is red, hit it with Triangle or Marvin, if a chicken is white, hit it with Gary. Stat buffs are unneccessary for this battle, it's all about speed and health maintenance. If a chicken is left alone too long without being hit, it will retreat to Gordon and heal him. If a chicken is hit with the opposite required type of attack it will self destruct. It's crucial to keep up with the attacks, even if it's one chicken at a time, simply because any chicken left alone will reverse all the work you put into the fight. The color of the chickens are figured at random, so always lead with a physical fighter and save Gary in the even you need him to hit a white chicken.
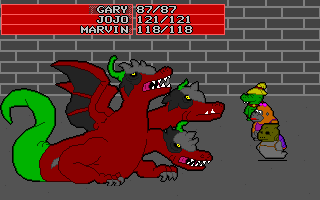
LOCATION: Pepper Palace
HP: 350 (each head)
EXPERIENCE: 2400; GOLD: 300
PRIZE: Dragon Blood
STEAL: N/A
Each head on the Pepdra Dragon is it's own obstacle. From left to right, the heads are Attack, Defense, Status. The first head to get rid of should be the Defense head since it can literally undo all of the damage you do to the others, plus it has a stat reset move. It would be figured out if you fought without this guide, but any head left alone has super powerful versions of their existing moves. The toughest of all of them is the Attack head. The suggested order of defeating the heads should be Defense, Attack, Status. Make sure Jojo is wearing the Stun Resistant item you should have picked up in the Corn Castle and anyone else with the Poison Resistant. Take out the Defense head as quickly as you can and have Gary and Jojo focus on healing the party. Then when Defense is gone, have Jojo switch to Red Bananas to Marvin and have Gary use items to keep the party healthy. When Attack is gone, you should be able to take out Status in no time with a very tough Marvin.
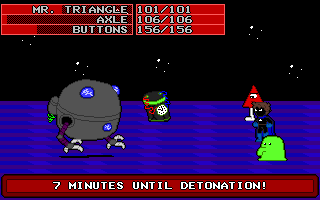
LOCATION: Pepper Palace
HP: 1200
EXPERIENCE: 2200; GOLD: 500
PRIZE: Drone Rocket
STEAL: Banana Bread
Like the Ghost Pepper you fought against with Axle, this enemy won't change form on it's own unless you hit it with a special move. Using Axle's Blade Shot when the Drone is in it's blue form, it will deal giant damage and get it to a form that will not allow it to counter with healing moves. If you don't follow this, you will die at the end of the seven minute countdown. The boss doesn't hit for giant damage, the real challenge is the timer. Have Buttons cast Regenerate on everyone to balance out the smaller damaging attacks and alternate between using Cherry Smoothies on either Axle or Mr. Triangle. If a hero can dish out enough damage, then have them hit the Drone during his blue phase, otherwise leave him alone unless he's hit with Blade Shot.
LOCATION: Underworld Below
HP: 1500
EXPERIENCE: 4000; GOLD: 500
PRIZE: Party Drinks
STEAL: Chrome Gem
Another straight-forward fight. The Guardian deals primarily in Earth element attacks, so be careful about the charms you've equipped earlier in the dungeon. The goal here will be to get your offensive fighters as tough as possible and focus Jojo on that, while, as needed, using Gary and another fighter to heal. While the Guardian has his armor he is slower and has higher defenses. Once you do enough damage to him, his armor will shatter and he will be faster, but his defenses will be significantly lower. At this stage, having characters with high attack power will benefit you greatly because you won't have the luxury of chipping away at him as easily.
LOCATION: Future City
HP: 500
EXPERIENCE: 6400; GOLD: N/A
PRIZE: Master Virus Strand
STEAL: RehabX
Virus Clones HP: 45 (each)
EXPERIENCE: 350 (each); GOLD: N/A
PRIZE: N/A
STEAL: Triangle Virus / Jojo Virus / Gary Virus / Marvin Virus
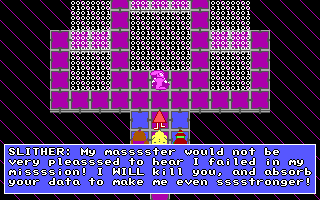
The thing about Slither is, he's never alone. If he is, he will do a group poison move and in that instance he creates virus copies of your heroes. Each virus hero has the same abilities and such as your characters, just not the same stats. Virus Jojo throws yellow bananas and red bananas. Virus Gary uses four elemental attacks. Virus Marvin uses a spread shot and a regular rocket and Virus Mr. Triangle just does a regular attack. Once Slither has his virus team, he begins to deal damage and then ramp up his own power. The first thing you should do is eliminate Virus Jojo. Slither will attempt to consume the other viruses to regain health. Slither will get a lot of power, regardless of how quick Virus Jojo leaves the fight, so it's important to keep building up your own as the fight goes. It's advised to have Jojo focus on raising either Mr. Triangle or Marvin's attack power and have anyone else focus on healing items. Once one hero can deal at least enough damage to take down a Virus Hero, start building up the other fighter. Gary is important to this fight simply because him using his Wind spell triggers Slither to remove the poison status from a hero. Using it four times can get your whole party straightened out. You will need to move quick, because once Slither has enough power, he will be too tough to manage. Be sure and steal from the Virus Heroes, after the fight you can use their items to make a really great item.
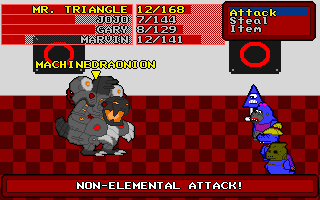
LOCATION: Team Onion's Base
HP: 1600
EXPERIENCE: 7400; GOLD: 300
PRIZE: Party Drinks
STEAL: Silver Gem
Machinedraonion is a slower opponent, but he has some very devestating attacks. To make it through this fight alive, you'll want to always keep at least one hero with full health. Machinedraonion has a move where he shoots a giant blast from his cannons, which exhausts his engines for a while, to give you time to recover or beat down on him. Keep one person alive at all times and focus on having Jojo buff one of your heroes. If you used the Onion Upgrader in the room right before the room with this boss, you can learn the "White" banana move for free for Jojo and it will help her boost her own magic, which makes every move she does do more.
LOCATION: Broccoli Bunker
HP: 999
EXPERIENCE: 8400; GOLD: 1000
PRIZE: N/A
STEAL: Rotten Peel (unlimited)
Commander Yellow has a few nasty moves to slow you down. Since he has the power of the Green Gem, he has power that the other commanders didn't. He has a drain move, where he does damage to all heroes and absorbs the total to himself. He has a lot of moves that reduce hero power and hit all heroes at once. For this fight, it'd be easiest to boost Jojo and Gary's magic with either Jojo's White move, or coconut smoothies. Boost Mr. Triangle and Marvin accordingly but let Gary do the bulk of the damage. When Yellow splits into his hologram forms, Marvin's barrage move doesn't have any effect, so focus on regular attacks. If you have Jojo's Nurse glove, it will help out a lot with the high chances of healing some to all heroes in addition to a regular heal.
LOCATION: Atlantis
HP: 2000
EXPERIENCE: 9000; GOLD: 750
PRIZE: Ink Gem
STEAL: Atlantean Gem
Squid Emperor has two forms. The first form being one where you can attack him, the other being where his evasion is so high that only Marvin can. He has a few tough moves including a few stun moves. If you've found any stun reduction items in the game, this is a good fight to equip them. There's one from Corn Castle, the Insomniac Add-On, that works great for Jojo, because this way if anyone else is stunned she can either use Green bananas, or throw out Lime Pies to heal everyone else. The Emperor has some debuff moves, so be sure and stay on the offensive all fight and keep the stunning checked.
LOCATION: Ape Rock
HP: 9999 (white) / 2000 (black)
EXPERIENCE: 9000; GOLD: 750
PRIZE: Banana Split
STEAL: YellowGreen Smoothe (white) / Chocolate Dipped Banana (black)
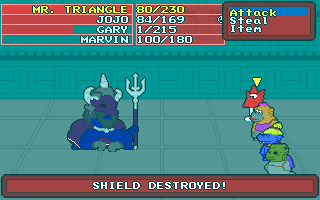
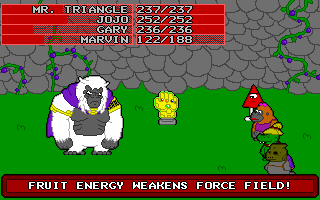
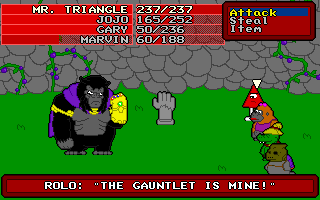
Rolo's fight is a test of patience. If you go head on into fighting Rolo you will die, so you need to realize that he counters and focus on buffing Jojo right away. Once the Gauntlet goes to Rolo, you can hurt him. However, he still will counter every move you do, so be sure and have spent the white phase building up Jojo so you can rebuff your fighters as soon as they are weakened to knock him out.
LOCATION: Swamp Overlook
HP: 500 (each)
EXPERIENCE: 700; GOLD: 700
PRIZE: Spirit Heart
STEAL: N/A
As only Gary for this fight, you must face his parents' spirits in a battle of elemental knowledge. You will need to attack with the right element before his dad can. Water beats Fire, Fire beats Wind, Wind beats Earth, Earth beats Water. Water is represented by Blue, Fire by Red, Earth by Orange, Wind by Green.
LOCATION: Eskimo Village
HP: 750
EXPERIENCE: 1600; GOLD: 700
PRIZE: Fire Scroll
STEAL: Chocolate Dipped Banana
Each Samurai Cat represents a specific element. The Swordsman represents Fire so using Water will do great. The Swordsman has a lot of very tough devestating moves so it's important to designate two healers for this battle. Use Jojo to boost Marvin's power right away so that he can use Lock-On to get rid of the summoned sword right away. The sword can hurt you and between that and a Swordsman attack, it could easily wipe out your party. Also, if a summoned sword is out, the Swordsman has the chance of destroying it to do a very powerful attack.
LOCATION: Fungi Town
HP: 750
EXPERIENCE: 1600; GOLD: 700
PRIZE: Earth Scroll
STEAL: Chocolate Dipped Banana
Each Samurai Cat represents a specific element. The Archer represents Earth. Using Wind element attacks on him will do well. When his summoned wall appears, it boosts the Archer's defense to the maximum. Raising the offensive stats of your fighters, take down the wall quickly and then you can focus on the Archer while your attacks can count.
LOCATION: Squash City
HP: 750
EXPERIENCE: 1600; GOLD: 700
PRIZE: Water Scroll
STEAL: Chocolate Dipped Banana
Each Samurai Cat represents a specific element. The Lancer represents Water, so using Earth will help you. The summoned bubble in this fight boosts Lander's magic. So it will be good to load up on Grape Pies from the Greens City bakery. Those are the easiest and quickest ways to get your Magic Defenses up. Marvin's rockets or Gary's Earth spell will pop the bubble quick. Lancer will only lose his magic buffs after he does his super move by destroying the bubble. Between Gary and Marvin you should be able to keep the bubble at bay to focus on attacking with Mr. Triangle.
LOCATION: Greens City
HP: 750
EXPERIENCE: 1600; GOLD: 700
PRIZE: Wind Scroll
STEAL: Chocolate Dipped Banana
Each Samurai Cat represents a specific element. The Dancer represents Wind, so using Fire attacks will do well for you. For this fight, the Dancer will summon a cloud and it boosts her evasion. Over time, no matter how many orange smoothies you drink, your characters won't be able to hit her naturally. Your best bet, is to use Jojo to boost Marvin's attack power as much as you can and just use his Lock-On attack and focus on having Gary and Mr. Triangle either buff Jojo's magic with Coconut Smoothies or use healing items.
LOCATION: Samurai City
HP: 2000
EXPERIENCE: 9000; GOLD: 2500
PRIZE: Samurai Mask
STEAL: RehabX
Samurai Statue HP: 200 (each)
EXPERIENCE: 300 (each); GOLD: 50
PRIZE: N/A
STEAL: N/A
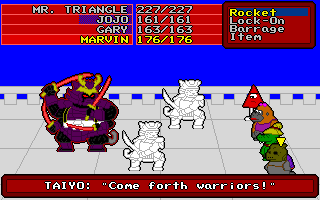
Taiyo has 4 forms. Each taking the properties of different elements. Red is Fire, Blue is Water, Green is Wind, Orange is Earth. Use this to your advantage when using Gary. Like the Samurai Cats you fought, Taiyo summons assist cats to help fight, except he summons 2 at a time instead of their typical 1. These summoned cats act basically like the Swordsman's summoned sword did. You will need to buff your heroes quickly to get rid of the cat statues so that Taiyo doesn't do his ultimate move which is a One-Hit-KO. Every magic attack done to him that is the weakness of his element causes him to change elemental shields. He will always summon new cats when he is alone as well.
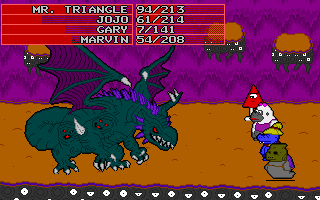
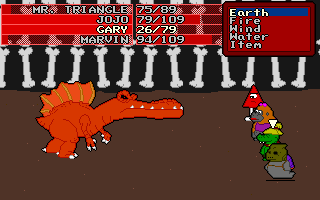
LOCATION: Spikeback's Temple
HP: 1500 (form1) / 2000 (form 2)
EXPERIENCE: 24000; GOLD: 2000
PRIZE: Banana Split
STEAL: RehabX (form1) / Stegosaurus Charm (form 2)
Each Dinosaur Lord is a master of a certain element. Spikeback is a master of Water. Since this is the boss from the Atlantis quest, you should have a good opportunity to buy or steal armor that is resistant to water elemental attacks. This will come in tremendous help with Spikeback does his strike-all moves that are water based. Spikeback has two moves that, if you understand them, you can plan for them. He will always target a hero with the strongest value of either power or magic. So in this fight, you will need to try to do a buff and then strike method to capitalize on the boost. When Spikeback goes into his 2nd form, be sure to steal to get a valuable charm. In this form, he will have a lesser chance of targeting magic/power fighters but still be prepared to rebuff.
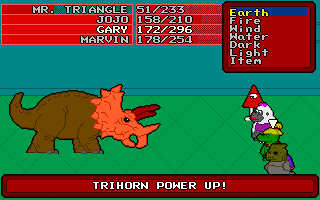
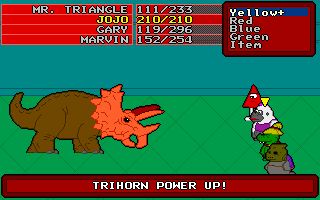
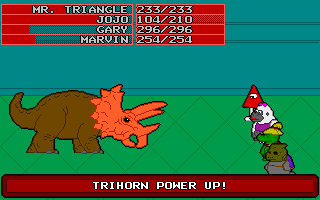
LOCATION: Trihorn's Temple
HP: 1000 (form 1, 2, 3) / 1200 (form 4)
EXPERIENCE: 24000; GOLD: 2000
PRIZE: Banana Split
STEAL: RehabX (form 1, 2, 3) / Trihorn Charm (form 4)
Each Dinosaur Lord is a master of a certain element. Trihorn is a master of Earth. Finding armor that is resistant to Earth, or at the very least, not weak to it, will be crucial to surviving. He has several forms, and it is possible to kill him before reaching his last form if you play it right. Every time he switches forms, he will debuff all of your heroes magic and power stats back to normal. If you spend form 1 buffing your heroes and NOT attacking, you can use 3 well timed moves from Gary, Mr. Triangle and Marvin to knock him out in 1 turn. If you max out the offensive stat, just one character with a weaker can do this since forms 1-3 have just 1000 HP. To get the Trihorn charm you will need to fight him to Form 4.
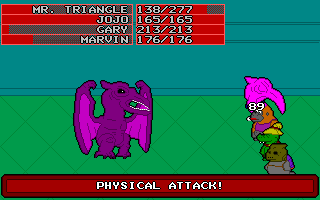
LOCATION: Skyhunter's Temple
HP: 1250 (form 1) / 1500 (form 2)
EXPERIENCE: 24000; GOLD: 2000
PRIZE: Banana Split
STEAL: RehabX (form 1) / Skyhunter Charm (form 2)
Each Dinosaur Lord is a master of a certain element. Skyhunter is a master of Wind. Finding armor that is resistant to Wind, or at the very least, not weak to it, will be crucial to surviving. Skyhunter has a fair amount of stunning moves, so equip items that are resistant to stunning for this fight, or at least reduce the effect of stuns. His stun attacks are wind based, so if you have even mediocre armor against stuns, but then in addition, some armor that buffers wind, it will help cut down the amount of time stunned by a lot. He will always hit the more dominant fighter with a powerful meteor attack and then follow up with a power debuff move. Be sure to steal from him when he reaches his 2nd form.
LOCATION: Crater Overlook
HP: 5000
EXPERIENCE: N/A; GOLD: N/A
PRIZE: N/A
STEAL: N/A
For this fight only, you will fight Mastermind as the Dinosaur King in his prehistoric armor. Mastermind primarily does large damage attacks but will alternate between a defensive pose and offensive poses. During offensive forms, use the King's "King Sword" ability to do damage but also restore a small amount of health. When Mastermind is in his defensive stance, use "King's Rage" to boost your attack power for the King Sword move. Maintain this strategy and Mastermind will be defeated.

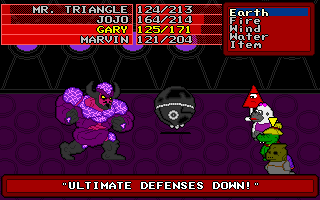
LOCATION: Mastermind's Spaceship
HP: 5000
EXPERIENCE: 10000; GOLD: 5000
PRIZE: Commander Dark Mask
STEAL: N/A
Commander Dark has two forms. One form is his Ultimate Defense form. In this form, if he takes damage of any kind, he will punish the heroes by reflecting the value of that attack against all heroes. He absorbs all magic in this form, which makes Gary unable to help in this form. If the fighter who hits him does more than 300 damage, Commander Dark will heal himself for 999. In his second form, which is triggered after any reflected attack, Commander Dark summons two defense drones to assist him in battle. If you have Mr. Triangle steal from them, he will be able to take their programming chips and cause them to reset all hero attack power. If the defense drones are left alone for too long, they will self destruct and raise all hero attack power. Once both drones are defeated, Commander Dark will return to his Ultimate Defense form and the cycle will continue. The trick to winning this fight is having Mr. Triangle available to steal from the drones to prevent your power level from reaching an unmanagable level. Then make sure and raise Gary's magic stat and alternate with Marvin to do damage and toss items to keep everyone alive. Mr. Triangle and Marvin should keep Jojo and Gary alive as they will be the two crucial elements of this fight, but one of them should be set aside for stat raising for the battle. Commander Dark has various moves that will raise the attack power of your strongest fighter to try and trick you into hurting him for his reflect attack to wipe you out completely.

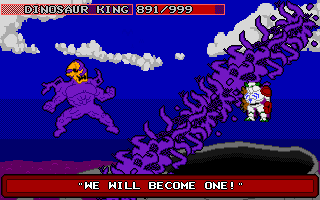
LOCATION: Inside the Meteor
HP: 10000
EXPERIENCE: 20000; GOLD: N/A
PRIZE: N/A
STEAL: Spirit Orb
Mastermind has the full strength of darkness and the Dinosaur Lords for this battle, so he has a large variation for this fight. Throughout this battle, he has 5 total forms. Form 1 is when he has all four dinosaurs, Form 2 is when the pterodactyl aspect is gone, Form 3 is when pterodactyl and t-rex is gone, Form 4 is when pterodactyl, t-rex and triceratops is gone, and Form 5 is when all four are gone. The way to trigger a form change is by having Mr. Triangle use his Steal ability. When he steals, he takes the Spirit Orb. This move causes a dinosaur spirit to leave the armored Mastermind and come out onto the battle to assist you. Each form of Mastermind has various strengths, which makes stripping him of these orbs very important to victory.
While in Form 1, Mastermind has maximum evasion, high power, high magic and maximum defenses. Each dinosaur represents one of these strengths. While in Form 1, only Marvin's Lock-On technique can hurt him since his evasion is at the max. Getting Mastermind to Form 2 opens up the ability to have everyone hurt him, however, the defenses will cripple your attacks. Using a physical attack while Mastermind has the T-Rex Sword will trigger a counter-attack that debuff's the attacker's power and defenses. Using a magic attack while Mastermind has the Triceratops cannon will trigger a counter-attack that debuff's the attacker's magic and defenses.
Once one of the orbs is out, using an element that the dinosaur represents on them will cause them to hurt Mastermind for high amounts of damage. Skyhunter will boost accuracy, Dinosaur King to boost power, Trihorn to boost your magic, and Spikeback to boost your defenses. All of these moves occur after the initial element used on each dinosaur.
When Mastermind reaches Form 5, he will be stunned for a determined amount of time and then his follow-up move will be a spirit absorb move which will remove all spirits on the screen and replenish 999 of health. Forms 3 & 4 you have a 25% chance of him using this move on his own. After using this move, it also debuffs your whole party of Magic, Power and Defense boosts. The way to win is to make sure and get Mastermind all the way to Form 5 as quickly as possible and then beating him up heavily from there. So long as you don't attack Mastermind, you won't lose any of your stat boosts before Form 5, so using your heroes for specific tasks will work best. If you have found the CoconutX Smoothies around the game, these will be very helpful in getting Jojo boosted enough to boost everyone else throughout this fight. Maintaining a balance of Stealing and Spirit Orb casting should be enough to insure your victory. The only times that Jojo will lose her boost in Magic will be after Mastermind absorbs the Dinosaur Spirits.
LOCATION: Inside the Meteor
Head HP: 10000 / Core HP: 20000
EXPERIENCE: N/A; GOLD: N/A
PRIZE: N/A
STEAL: N/A
Omnicron is composed of two parts. The head and the core. The head serves as a defensive measure to the core itself and can't be killed, but can be temporarily stunned. The core is protected by a cage of teeth, the only way to expose the core to deal damage to it is to hit it two times to knock out the teeth. Only then will you be able to do full damage to it. Omnicron has an arsenal of moves to divert your attention from the core so it's important to pace yourself appropriately. The head has one move that you need to plan for, and that's it's Paralysis move where it will count for 999. The only way to counter this move is by equipping one of your heroes with something that nullifies Stun element attacks. So long as one hero is around, either use Jojo's Green Bananas or, better yet, have a stockpile of Lime Pies from Greens City Bakery to restore everyone from the status. Omnicron also has a Poison move, but that move won't fully take your heroes out of comission like the stun will.
When the head has taken enough damage, it will do a move that will reduce everyone's health to nearly 1HP. It's important to remove the poison status when you attack the Head because if you knock it out and it does that move, it could still wipe out your party. While the head is stunned for a while, you can attack the Core without fear of getting attacked. If you expose the Core while the Head is still active, it will trigger the Head to do additional moves, making it able to do up to 3 moves at a time. One of his moves restores 999 of health to the Core.
Making sure to have someone with an anti-stun move and poison healing items is vital to survival. In addition to that, before your heroes are ready to do more than the 999 Core Restore move, make sure to increase Jojo's Magic with either her White Banana move, the Coconut Drinks or a Coconut X Drink. Then have her increase everyone's respective power and magic to offset the Core Restore. This will also help get the Head to a stunned status quicker if your heroes can do the maximum damage. Maintain a strong defense as you build your offense and then you will have enough to take down Omnicron.
Located in Mr. Triangle's Bathroom.
Located right outside the cave from the mainland to get to Tomato Tower.

Located on the western wall of the cave with the Fat Fox statues. The cavern is located on an island in the southeastern region of the world map.

Located near Leroy at the north of the room.
In the Battle Dome building, go to Dr. Science's Room. The orb is located on the eastern wall near the exit.
Located on the other side of the rubble to the north of the 1st room.
Located at the north-western part of the room.
Located in the Throne Room, of the Royal Chambers, along the north-western wall. If you haven't found it yet, the switch to the left opens a secret path in the Tube Transit to an Onion Upgrade machine.
In the Blue Gorilla's building, the orb is located along the western edge of the wall.
In the entrance area, the orb is located behind a tree to the north-western area.
Located in the 2nd room behind a bush.
To get to this gem, you will need to also equip the Monk Glasses. From the 1st room, from Dwarf City, go through the north secret path. The Secret Glasses reveal another path in that room.
Located in the 1st room near the northern most wall.
To be able to go inside of the barn to get this gem, you will need to finish the bounty quest for the Wheat Farm. After you defeat the Farmer in his rematch you can go to the eastern wall and get the gem.
Located in the 2nd house from the left. The gem is along the western wall.
Located in the north-western area near the top edge of the pond behind a bush.